In this article, we will talk about How to Disable the BitLocker Encryption in Windows 11 24H2.
BitLocker, according to Microsoft is a Windows security feature that provides encryption for entire volumes, addressing the threats of data theft or exposure from lost, stolen, or inappropriately decommissioned devices.
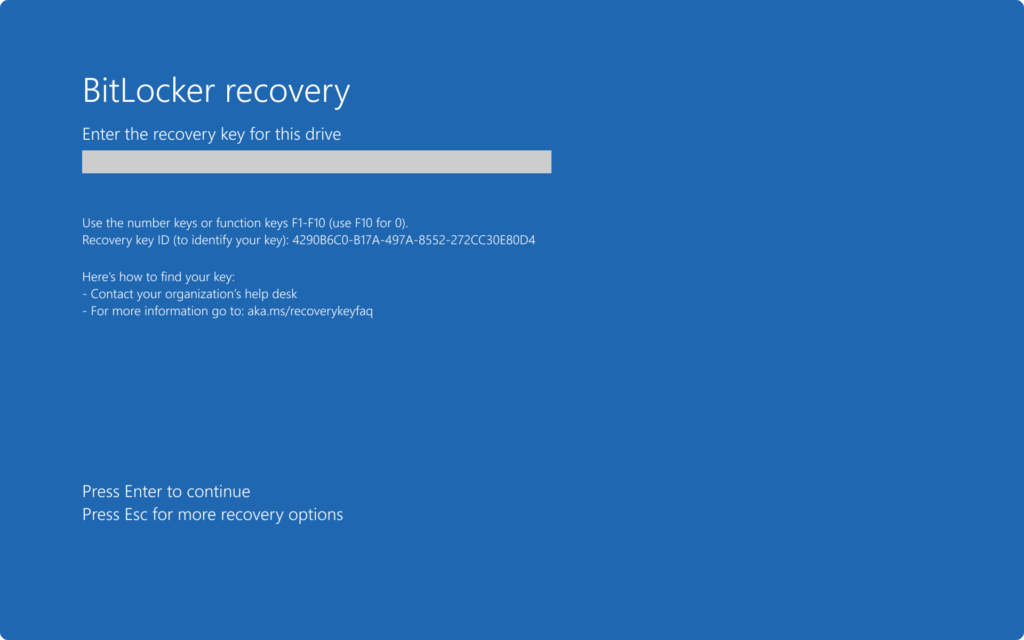
This can sometimes be annoying as you will need to get your Encryption key from the Microsoft Website, whenever you are requested it. Without that, you cannot enter into the OS.
In this article, I will show you 3 ways in which you can Disable BitLocker in Windows 11 24H2.
- Disable BitLocker from Windows 11 24H2
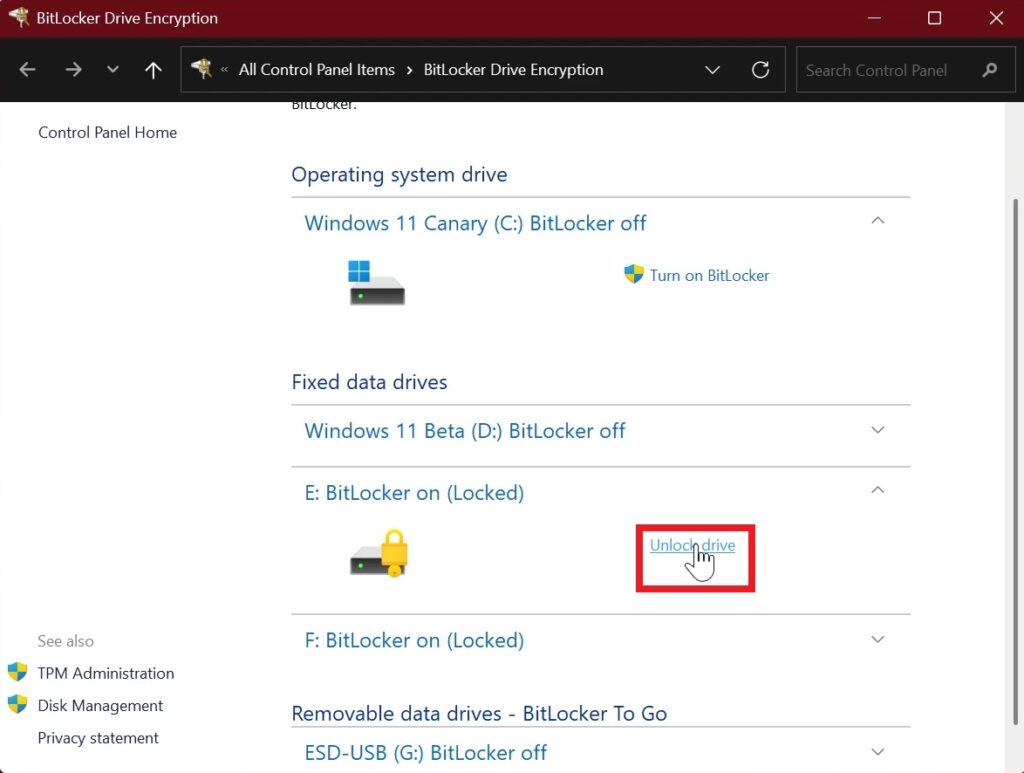
If you already have your system BitLocker Encrypted, you need to type in the Search Box, BitLocker, and then click on Manage BitLocker.
From there, locate the Encrypted Partition and then click on Unlock drive.
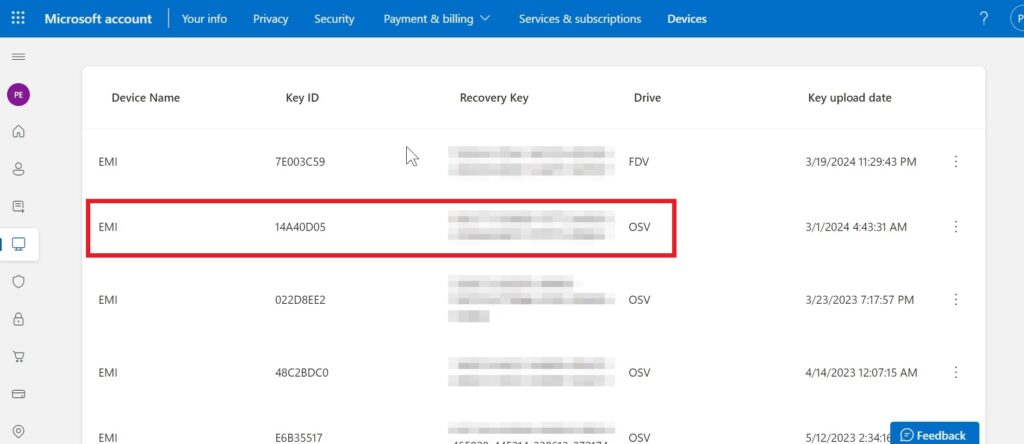
You will now need to provide your Recovery Key, which you can find inside your Microsoft account at this link. Make sure to check the Key ID and get the right Recovery Key from your Microsoft Account.
In my case, this is the right Recovery Key.
After that, you will need to Click on Turn off BitLocker and then again on Turn off BitLocker.
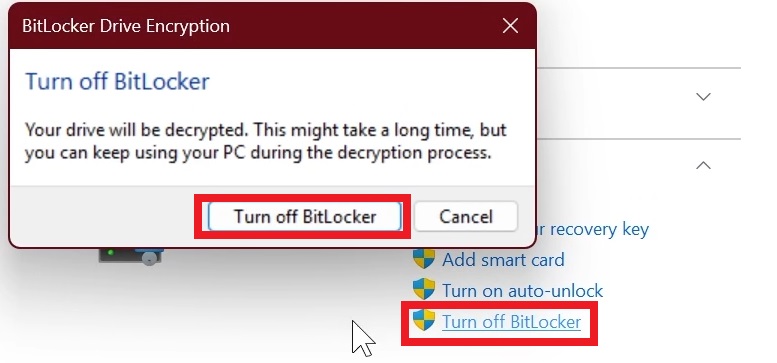
After that, the process of Decryption will start, and it will take a few minutes, depending on the size of that partition.
Additionally, you can also check Device Encryption in the Settings App, and disable the option, if it shows for you.
2. Disable BitLocker with a Bootable USB Drive
For this process, you can get Rufus from here and then Create a Bootable USB Drive with Windows 11 24H2.
In the software, you will just need to select the ISO, change the Volume label if you want to and then click on Start.

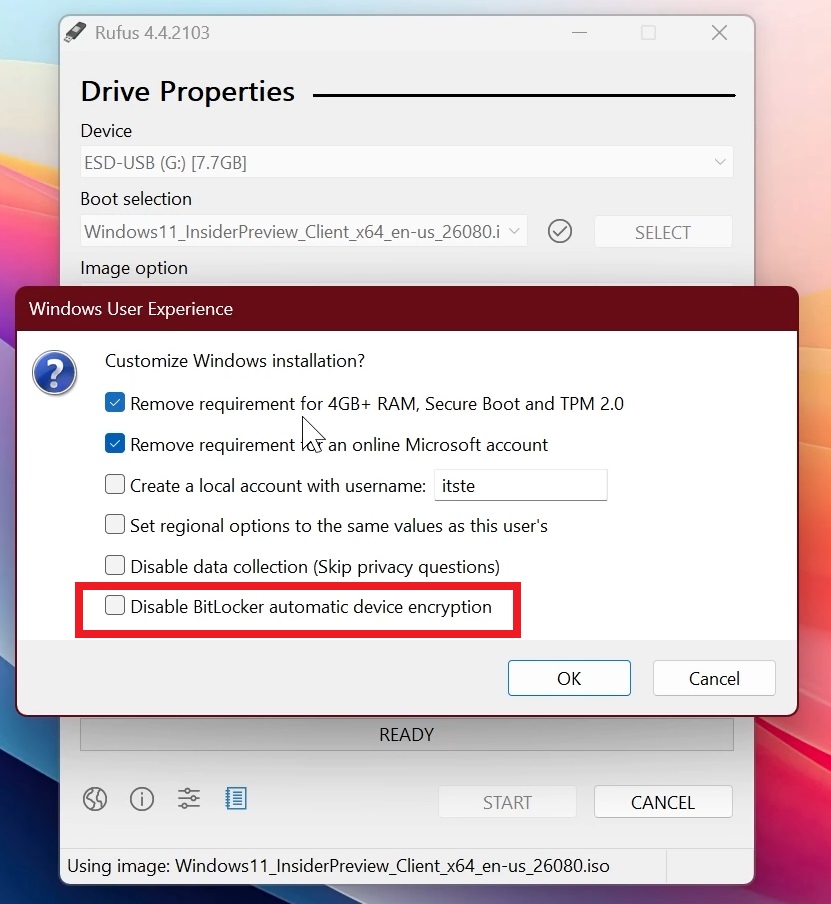
In the window that appears, you can click on Disable BitLocker automatic device encryption and then click on OK. This way, you won’t have to deal with BitLocker Encryption when installing Windows 11 24H2.
3. Disable BitLocker from the Windows 11 24H2 Installation
If you already started the installation process of Windows 11 24H2 through an ISO, you can still Disable BitLocker whenever you get to the OOBE part of the Installation. If you are not familiar with the New Windows 11 Installation process, you can check this article.
When you get to the Country and Region section, you can use the Shift + F10 Keyboard shortcut to open the CMD. Inside CMD type regedit and then press Enter.
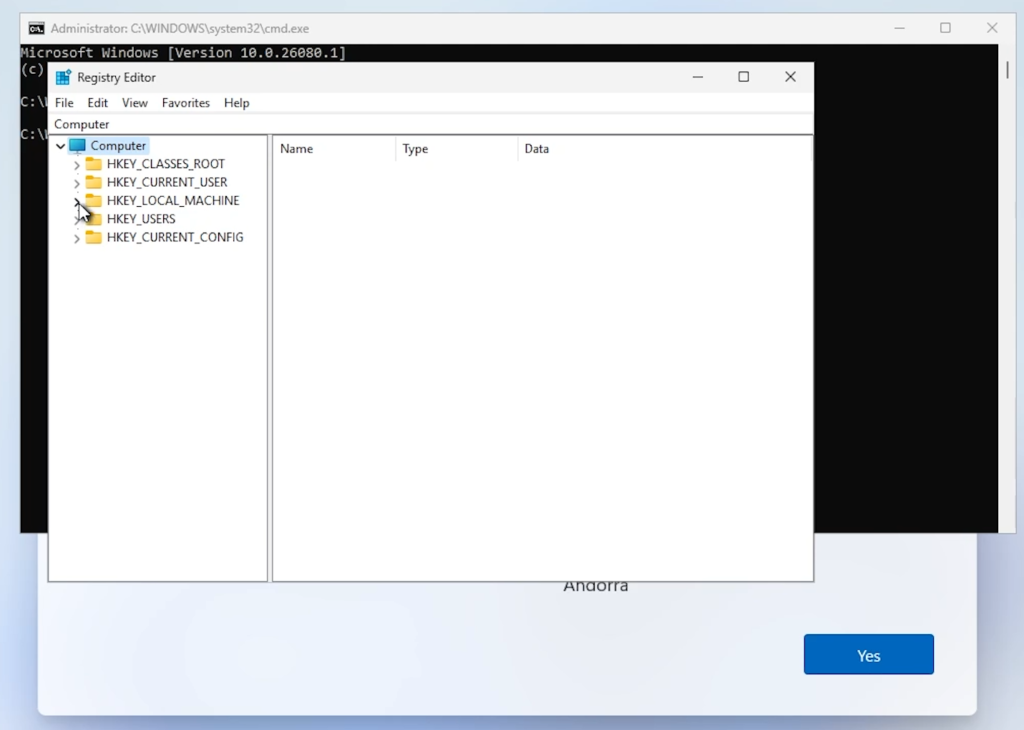
Inside the Registry Editor, you need to get to the following location:
HKEY_LOCAL_MACHINE\SYSTEM\CurrentControlSet\Control\BitLockerInside BitLocker, right-click, then on New and DWORD (32-bit) Value. Name the value PreventDeviceEncryption, double-click on it and change the Value Data to 1.
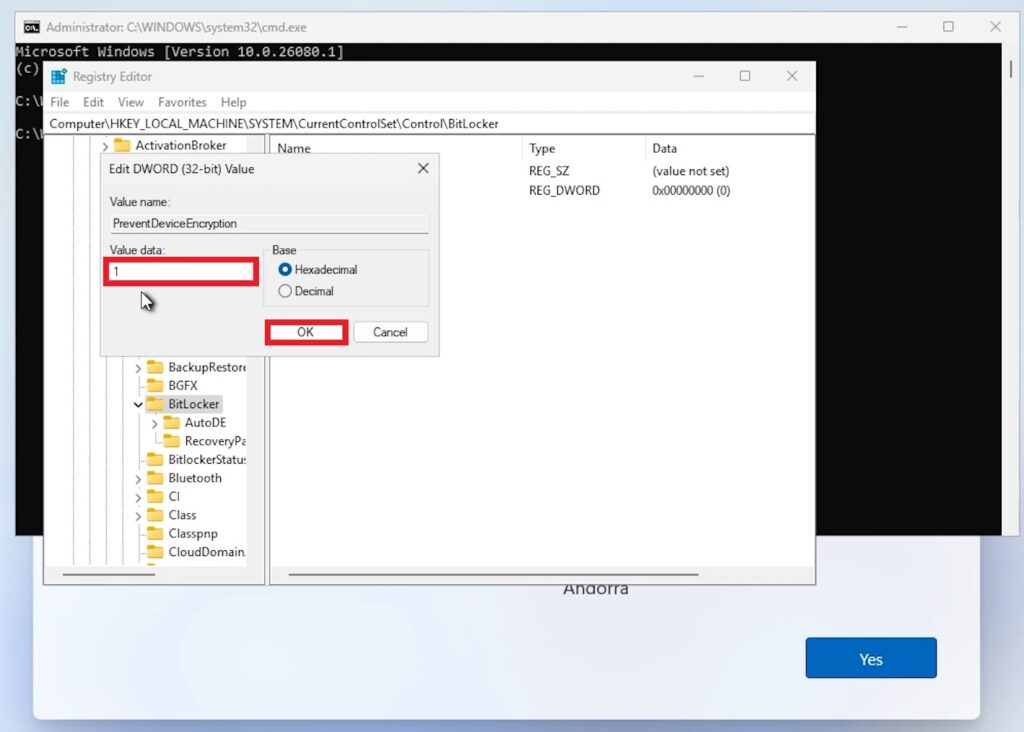
After that, you can close every window and continue the Windows 11 24H2 Installation.
For a more in-depth tutorial, you can watch the video below from the YouTube channel.

