In this article, I will show you how to Install Windows 11 24H2 on an Unsupported PC with less than 4GB of RAM, no TPM or Secure Boot.
I will show you 2 different methods that you can use in order to Install Windows 11 24H2 on an Unsupported Computer, that doesn’t meet the CPU, TPM, Secure Boot, and RAM requirements from Windows 11.
Download the Windows 11 24H2 ISO (you will need it for these methods)
1. Bootable USB Drive Method
Next up, you will need Rufus version 4.5 which has included Windows 11 extended installation which will automatically bypass the TPM 2.0 and Secure Boot checks.
At last, obviously, you need a USB Drive that has at least 8GB of space. Make sure to backup all the files and data from the USB Drive before doing this process, because everything from there will be erased.
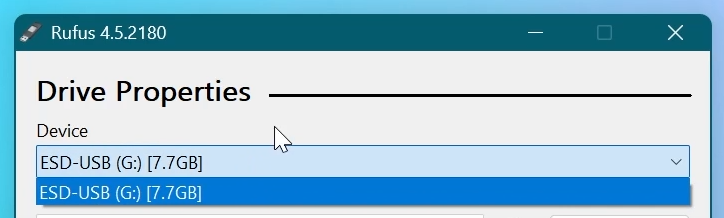
In Rufus, in the Device section, you will need to select the USB Drive where you want the ISO to be copied.
In Boot selection, make sure to select the Windows 11 ISO that you downloaded before.

Make sure the partition scheme is GPT and the Target system is set as UEFI (non-CSM).
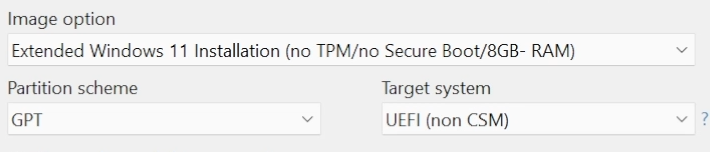
You can change the Volume label and the other settings leave them as they are.

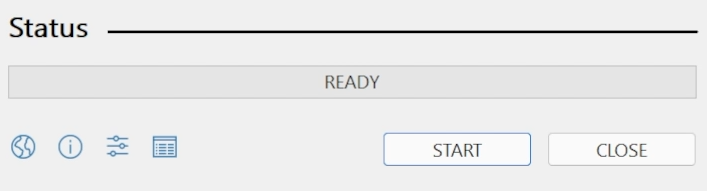
After you are finished, you can click on START and the process will begin.
You will now be able to Customize the Windows 11 22H2 Installation. You can do the following:
- Remove requirement for 4GB+ RAM, Secure Boot and TPM 2.0
- Remove requirement for an online Microsoft Account
- Disable data collection (Skip privacy questions)
- Set a local account using the same name as this user’s
- Set regional options using the same values as this user’s
- Disable BitLocker automatic device encryption
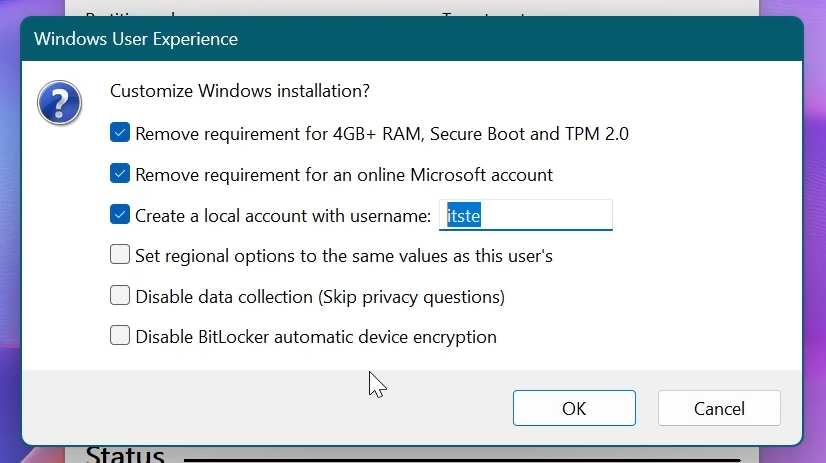
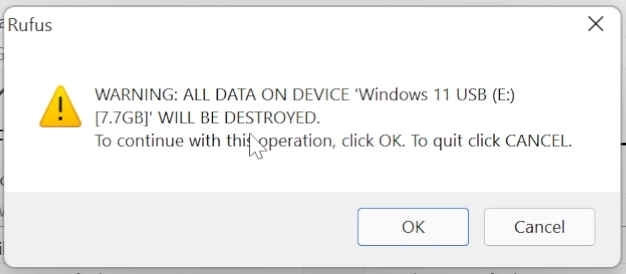
After you select everything and click on OK, you will be once again warned that all the data from the USB Drive will be erased.
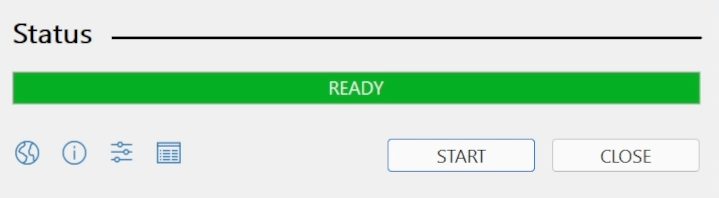
After the process is finished, you will see the following status. You can now go on and install Windows 11 by clicking on the setup or by using the Boot Menu.
2. Installation Process Method
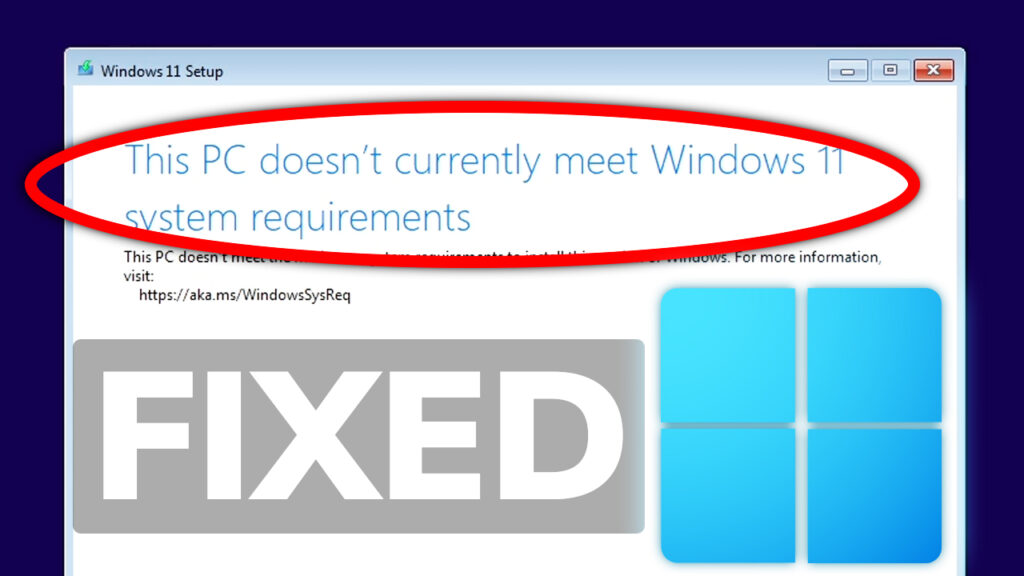
Normally, when you try to install Windows 11 24H2 on an unsupported machine, you will receive the following error, which is This PC can’t run Windows 11. This won’t allow you to continue with the setup and the only option would be to cancel the setup.
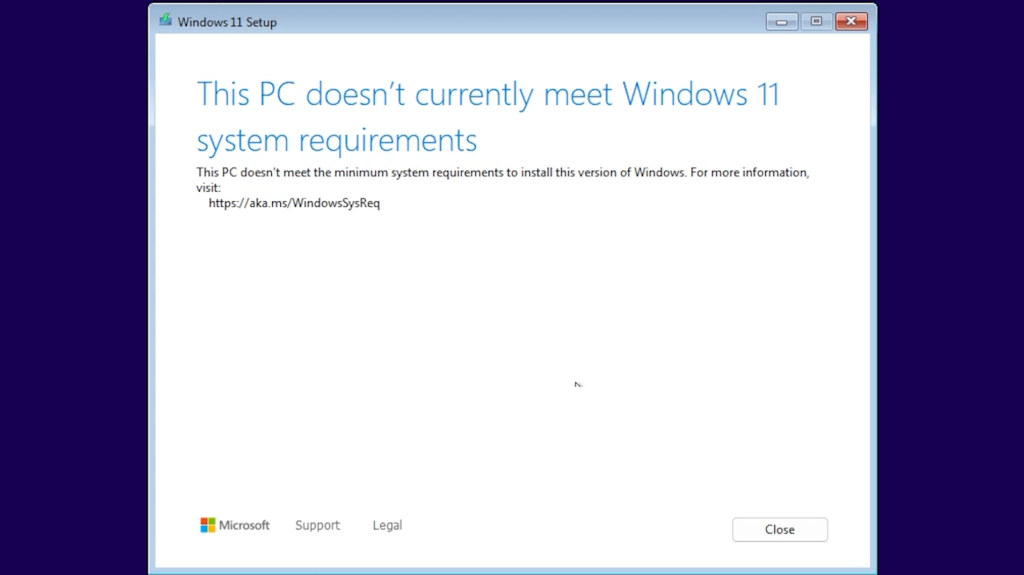
To bypass this, in the easiest method possible, just go back to where the setup lets you click on the back button.
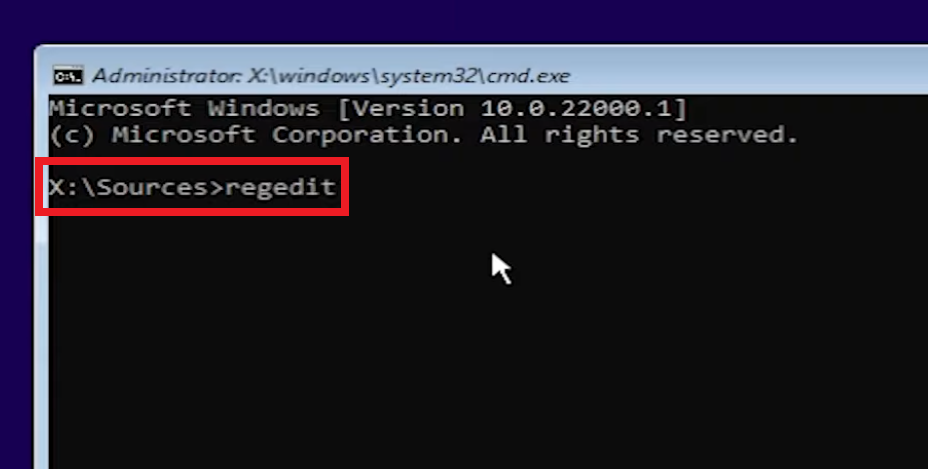
Press the keyboard combination Shift+F10 to open the command prompt in the Windows 11 setup. In the command prompt type regedit, to open the Registry Editor.
In the Registry Editor, go to the following location:
HKEY_LOCAL_MACHINE - SYSTEM - Setup Right-click on Setup and then click on New and then Key. Name the new key, LabConfig.

Double-click on LabConfig, and then right-click in an empty space, New, and then DWORD (32-bit) Value.
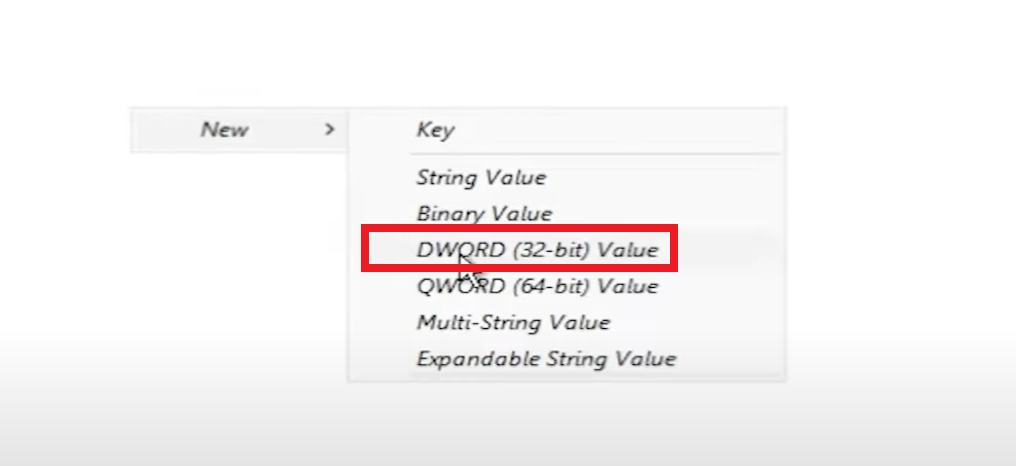
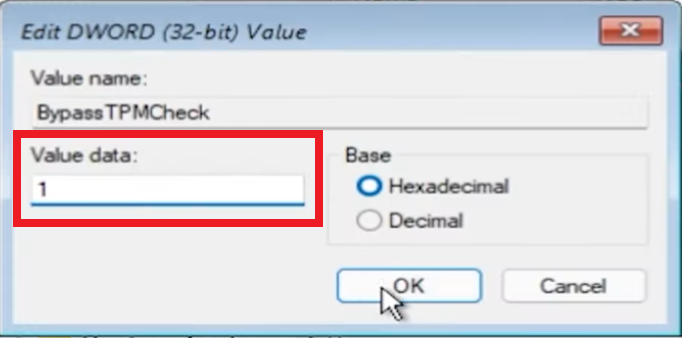
Create 2 new values, one named BypassTPMCheck and the other one BypassSecureBootCheck.
Double-click on each value, and then change their value data to 1.
You can now close every window and continue with the Windows 11 setup. The installer will be the same, but you won’t be bothered by any other errors.
For a more in-depth tutorial, you can watch the video below from the YouTube channel.