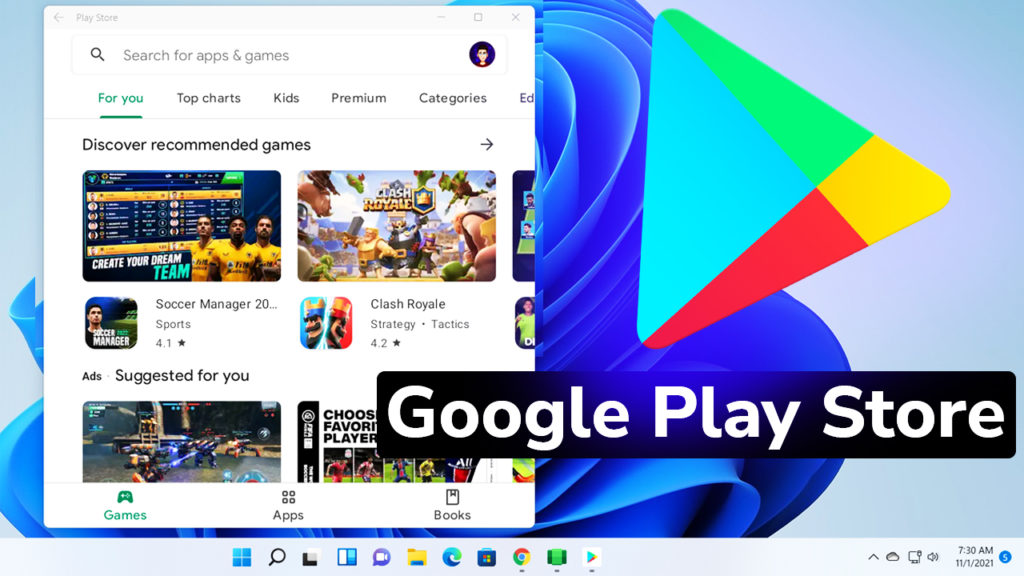
In this article I will show you how to install the Google Play Store in Windows 11 using a way easier method than the previous one presented in a previous article.
For this process we will use a Github Repository created by an user named LSPosed. He put together all the packages and modifications needed in order for you to be able to install the Google Play Store with the Windows Subsystem for Android.
LSPosed Github link with WSA and Google Play Store
Of course you still need to meet the minimum requirements, but we’re not going to focus on those. You can find them in this article.
Go into the Github Repository and then click on the Fork button to create a copy of that repository in your Github account (of course you will need a Github account for this).

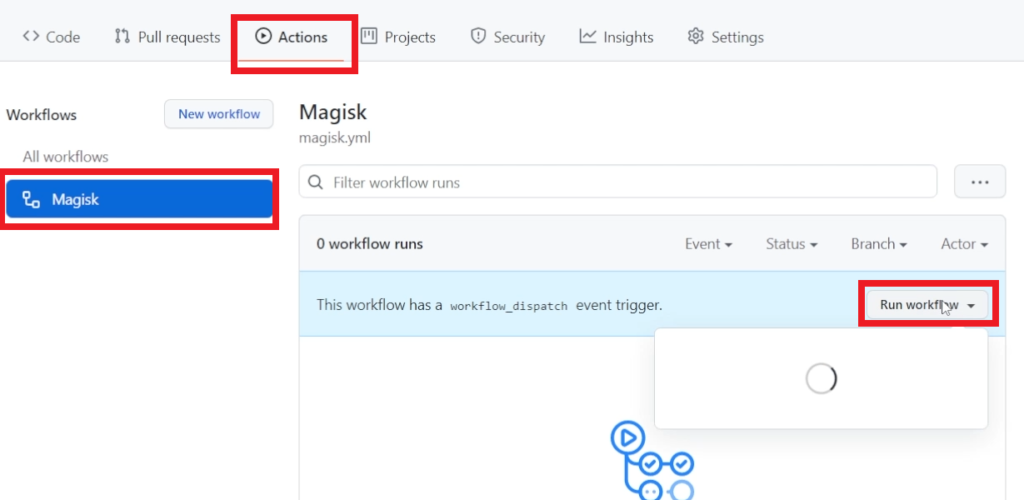
After you created that copy, go into the Actions tab, from the left side click on Magisk and then click on Run workflow.

Here, you will need to select the desired variant of Google Apps that you want. For this test, I used the pico variant. Type in the field the variant that you want and then click on Run workflow.

The process can take up to 5 minutes and after it is finished you should see a green checkmark near the Magisk Workflow.

Click on the Magisk workflow and then scroll down to the Artifacts section. Download the version for your system.

An archive will be downloaded and you need to extract it.
Also you will need to enable the Developer Mode in Windows 11. Open the Settings app, search for developer mode and then enable it, by clicking on the Yes button. After that run the command again and you should be good to go.

After this, in the extracted folder, right click on the Install Powershell Script and then click on Run with Powershell.

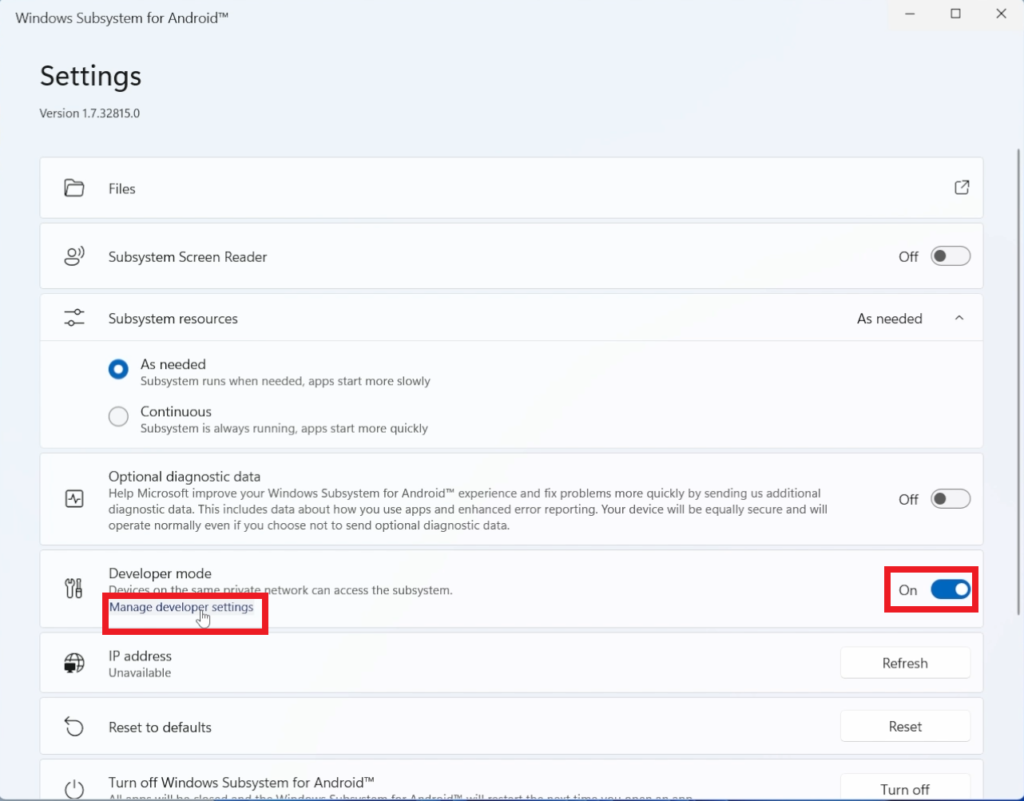
After the installation is finished, open Windows Subsystem for Android and enable Developer mode and then click on Manage developer settings.

Deselect Share my diagnostic data and then click on Continue. After the app is opened you can close it and open the Google Play Store.

And that’s it. You successfully installed the Google Play Store in Windows 11 with the Windows Subsystem for Android.

For a more in depth explanation, you can watch the video below from the youtube channel.


i cant acess github.com action please upload zip file another source please …
This is the only way. You need a Github account.
Hey
First of all thank you so much for the beautiful guide!
I downloaded the file properly, and I don’t see the file ” ‘Install’ for Powershell Script” Inside the extracted folder.
I’d love you to guide me on what to do. Thank you
Make Sure You Downloaded the x64 variant if you’re on pc and arm if you have an arm based system
English (with translate) :Gives error when running install file
Romana : Da eroare cand rulez fisierul install
Un clip pe canalul in romana cu : Instalați Google Play Store în Windows 11 (metodă ușoară)
Troubleshoot downloading: After I unchecked “Share my diagnostic data”, I received the message ” Unable to start Windows Subsystem for Android”. And in the error message it reffered back to this link ‘https://aka.ms/enablevirtualization’. What should I do to solve this? Since it looks complex to solve. Otherwise, how do I revert everything back to normal? Since it clearly did not work.
You need to enable Hyper-V and Virtual Machine Platform. Also in your BIOS enable processor virtualization. Check links in the article for info on that.
Git account gets suspended instantly
Recently I successfully installed Win 11 (Enterprise, 21H2 / 22000.258) on my iMac 27 late 2014 (MacOS Big Sur 11.6.1) via Parallels Desktop (Ver. 17.1.0.51516). After then I installed WSA (Windows Subsystem for Android) on Windows 11. But it cannot run with the following information. Therefore, a subsequent installation cannot be performed, ie. Google Play Store.
“Ensure that Virtual Machine Platform is enabled in optional Windows features. Ensure that your device has virtualization enabled in the bios. If you’re running Windows Subsystem for Android in a VM ensure that you have enabled nested virtualization for the VM on the host.
See http://aka.ms/enablevirtualization.”
According to the information prompt, I have conducted the following check:
1. Checking the Windows Virtual Machine Platform, the Windows Virtual Machine Program Monitor Platform, and the Hyper-V were selected.
2. Because of iMac 27 doesn’t have BIOS, the Virtualization cannot be enabled from UEFI. I try to select the “Recovery –> Start Now –> Troubleshooting –> Advanced Options –> UEFI Fireware Setting, but there is no UEFI at all.
3. I tried to close the Windows and open the setting of the Control Centre of Parallels Desktop, and to select the CPU/Memory –> Advanced Option under the Hardware Tab: With Apple, the “Nested” is gray, not optional. But the “Nested” under Parallels is optional. After option out of the settings, try to restart Win 11, cannot start. Tip below:
“Windows 11 cannot be installed because Parallels Hypervisor System Extension is not load.” “Tip Action under macOS System Preferences –> Security and Privacy –> General. Click “OK” and agree to load Hypervisor System Extension resolved. But never display the “OK” interface for clicking.
To sum up, I would like to ask the warrior to help solve the following problems:
1. How to enable Nested Virtualization for Parallels Mac VM (If “Apple”is enabled, the “Nested –> Nested Virtualization” option is gray, and Win 11 cannot be installed or started after selecting Parallels;
2. How to load the “Parallels Hypervisor System Extension under macOS System Preferences –> Security and Privacy –> General, due to display screen with no pop-up;
3. How to enter the BIOS / UEFI on the iMac 27 virtual machine, select / Enable Virtualization Technology;
4. How to create a simulated UEFI startup for the iMac 27 by myself.
5. Or another command line turns on Nested Virtualization.
……
Thanks a lot!
dirkseng / Peking / China
e-mail: dirkseng@126.com
You can’t run a VM inside a VM it’s just not possible with the technology of today. I am fairly certain that Parallels is actually just a VM running Windows but I could be wrong about that.
You can do it. I tried it, using various different software.
Sadly dont work for me.. when trying to run install.ps1 with right click powershell.. it opens powershell and then powershell closes .
Am on a Porsche book 7gen i7 16GB.. I have had WSA + google playstore installed before by \msandroid.Msixbundle” back in Oktober
and here it worked great WSA and also Google playstore, but as there came newer windows rev.build that WSA app stopped playing along .
and I right click and removed wsa-appen on my system and it cleared all the android aps, alongside it.
Im wondering.. is there some registry hanging that is choking my poweshell from running that install.ps1 in the Magisk fork
Im not sure how to continue.. can i manually run the right file inside the folder. when this powershell script wont do its thing.
If I manually just try to hit the wsa exe file in the folder, it says system error, cannot proceed msvcp140_app.dll was not found.
I have hyper V and virtu and all that jazz activated and it worked fine some weeks back…
After installing windows subsystem for Android with play store using this easy method, is there any easy.method to uninstall?
New github accoung instantly banned when forking the provided repository. Guess they dont like it.
It Works!
it works beautifully. Can you share how to transfer files between Win 11 and Android, both ways
it works beautifully. Can you share how to transfer files between Win 11 and Android. from android to windows and win to android
Hi there, as soon as I click on “Manage Developer Settings” a popup window will appear saying “Starting Windows Subsystem for Windows” and in about 3 minutes it just closes without the install being completed.
Any advice?
Thanks for the effort.
How can I install this on multiple user accounts? I successfully followed this on one account, but when I try to run the installation script on the second user account, the script throws an error.
I tried to download from gitHub but this message appearing
“Access to this repository has been disabled by GitHub Staff due to a violation of GitHub’s terms of service. If you are the owner of the repository, you may reach out to GitHub Support for more information.”
Now from where i can download the file. please help
repository has been disabled