In this article, I will show you How to Disable Copilot AI in Windows 11 (2023).
Microsoft has released Copilot AI in Windows 11 Moment 4 Update for Windows 11 22H2 and a lot of users don’t like the new AI integration. Along with that, Copilot is still in the Preview Stage, so if you don’t want it on your system yet, you can simply disable it, using one of the 3 methods that I am going to show you in this article.
Disable Copilot from the Taskbar
To disable Copilot from the Taskbar, right-click on the Taskbar, click on Taskbar Settings, and in the Taskbar Items section, simply uncheck Copilot (Preview).
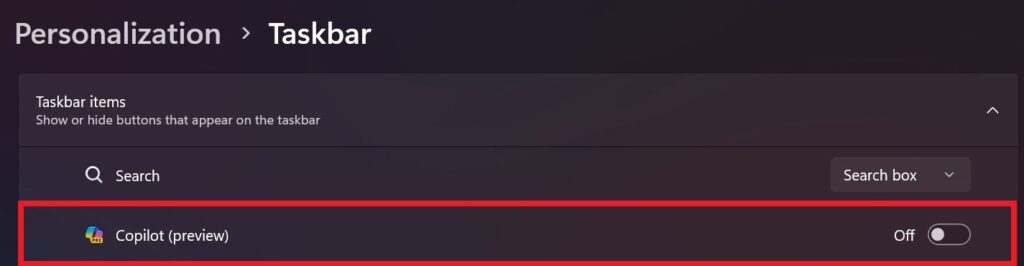
This way Copilot will be hidden from the Taskbar and you won’t be able to accidentally open it again.
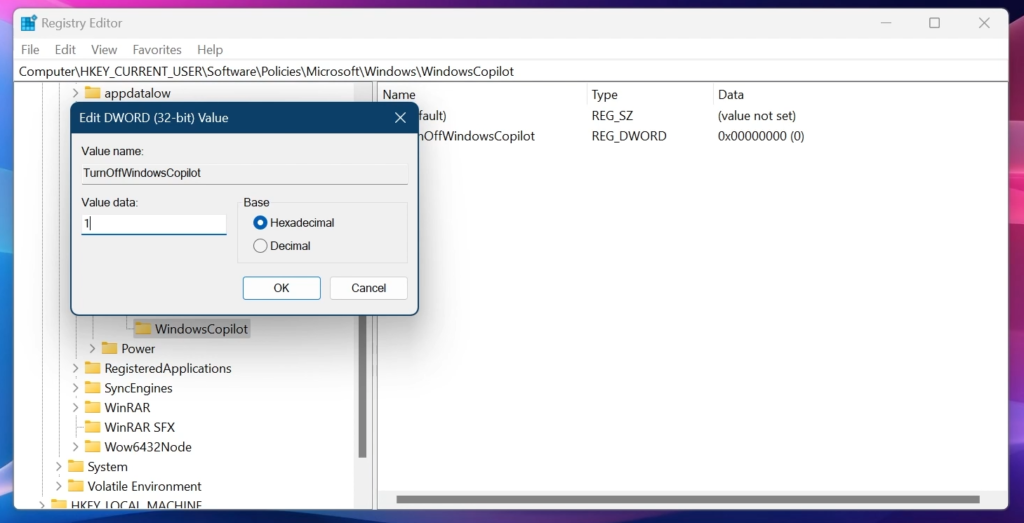
Disable Copilot from the Registry Editor
Open Search in Windows and then search for Registry Editor. On User Account Control, click on Yes.
In the Registry Editor, navigate to the following location:
HKEY_CURRENT_USER > Software > Policies > Microsoft > WindowsRight-click on the Windows Key and then Create a New Key named WindowsCopilot.
In the New Key, make sure to create a New DWORD (32-bit) Value named TurnOffWindowsCopilot.
Double-click on that and change the Value Data to 1. Restart your computer after, so that the changes will take effect.
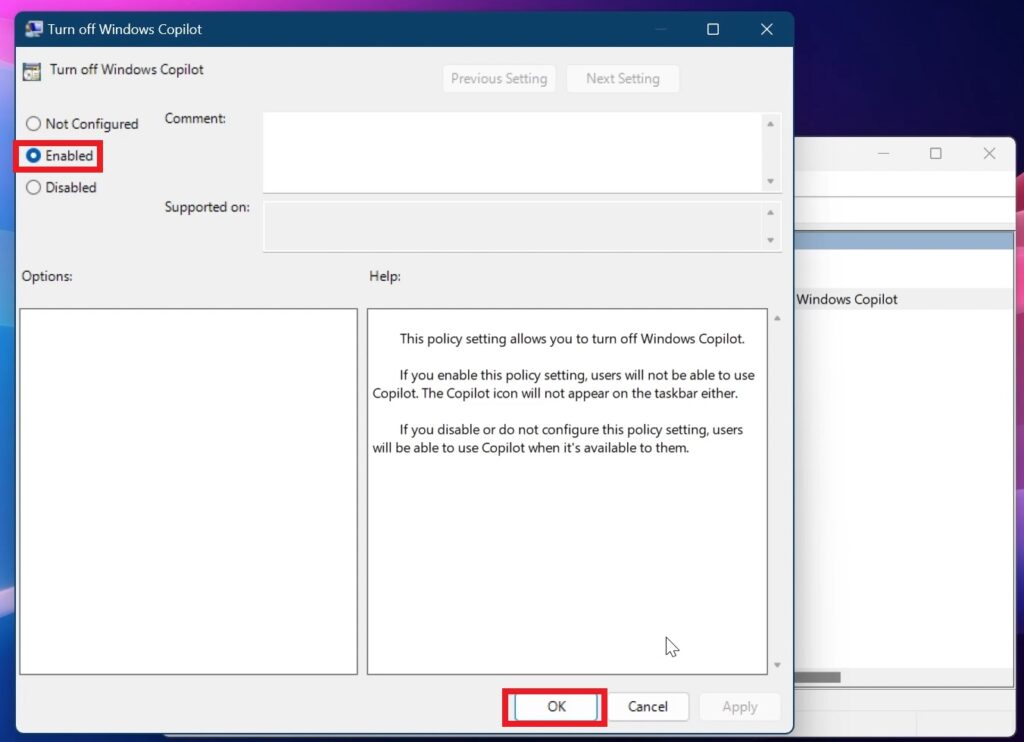
Disable Copilot from the Group Policy Editor
Open Search in Windows and then search for Group Policy Editor.
In the Registry Editor, navigate to the following location:
User Configuration > Administrative Templates > Windows Components > Windows CopilotHere double-click on the Turn Off Windows Copilot Policy and then set it to Enabled. You can click on Apply and then OK.
Restart your computer after, so that the changes will take effect.
For a more in-depth tutorial, you can watch the video below from the YouTube channel.