
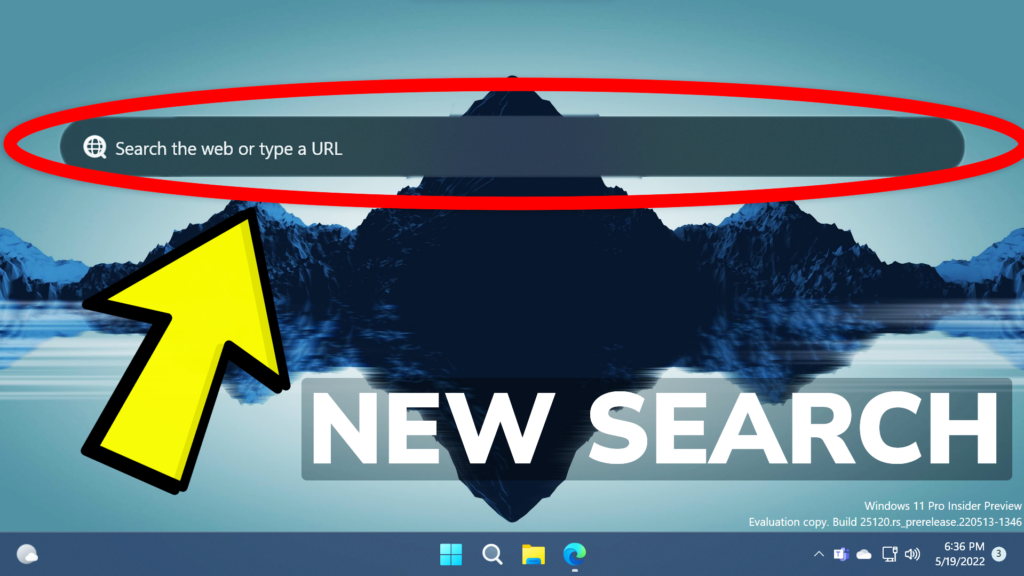
In this article, I will show you how to manually enable the New Search Box on Desktop that you can use to search the web, firstly introduced in the Build 25120.
To be able to enable this feature, of course you need to be enrolled in the Dev Channel of the Windows Insider Program of Windows 11.
How to Enable New Search Box on Desktop
You will need to download ViveTool, which is a small app that will help us enable hidden features from Windows.
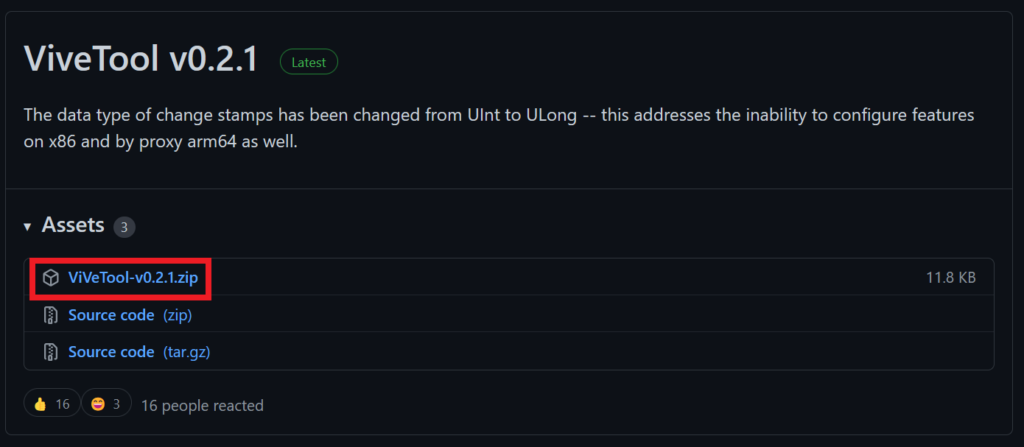
After you download ViveTool, you will need to extract the contents of the archive into the System32 location so that we can have full administrative privileges to the operating system.
Right-click on the archive and then click on Extract all. Select the System32 location and then click on Extract. You will also need to provide some administrative privileges.

After you’ve done that, you will need to open CMD as administrator and then copy and paste the following commands:
vivetool addconfig 37969115 2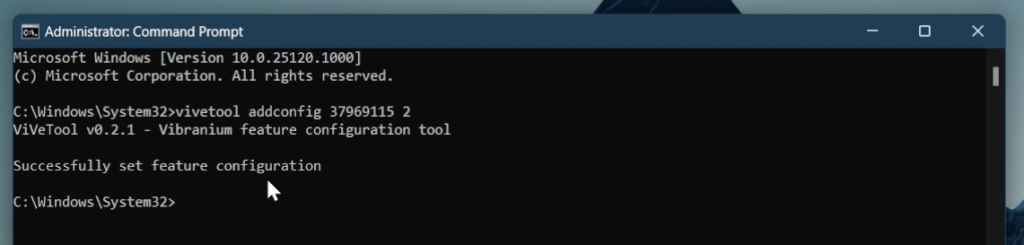
After the commands were run successfully, all you need to do is to restart your computer for the changes to take effect.
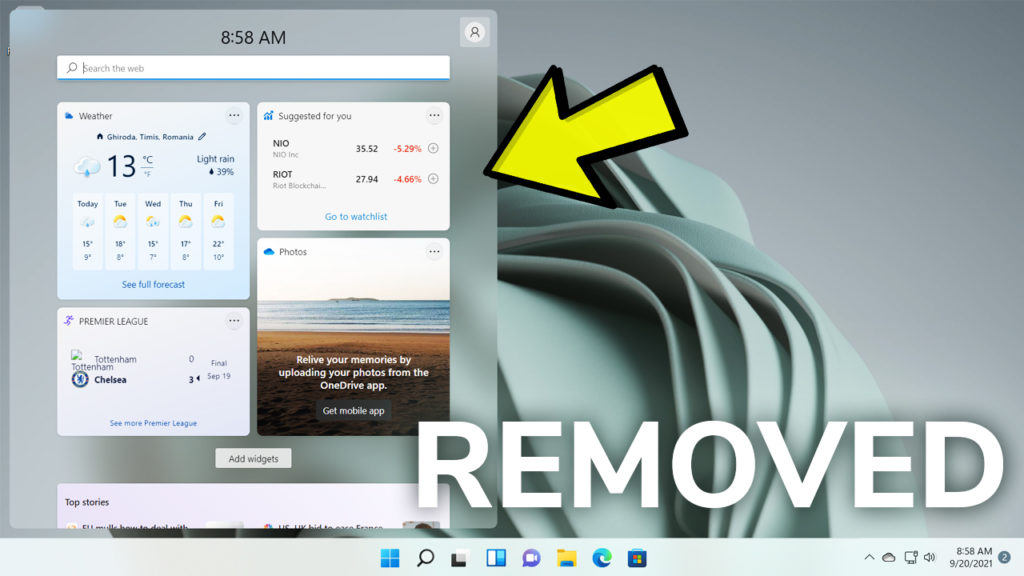
After the restart, you should see the New Search Box on the Desktop, that you can use to search the web.
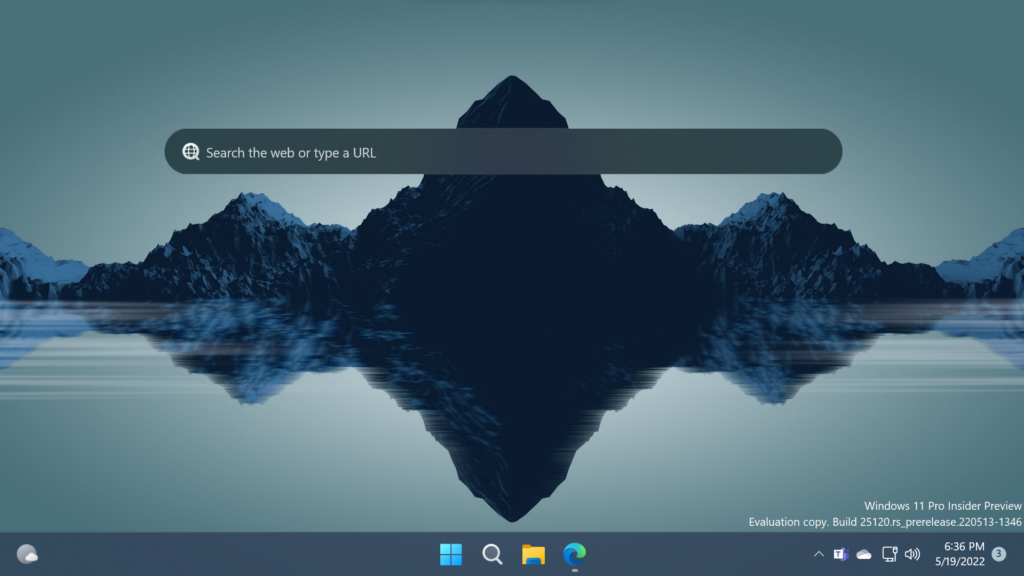
The problem with this Search Box is that you cannot move it, or minimize it. In addition to that, you cannot change the default search engine or the default browser used, other than the Edge Browser.
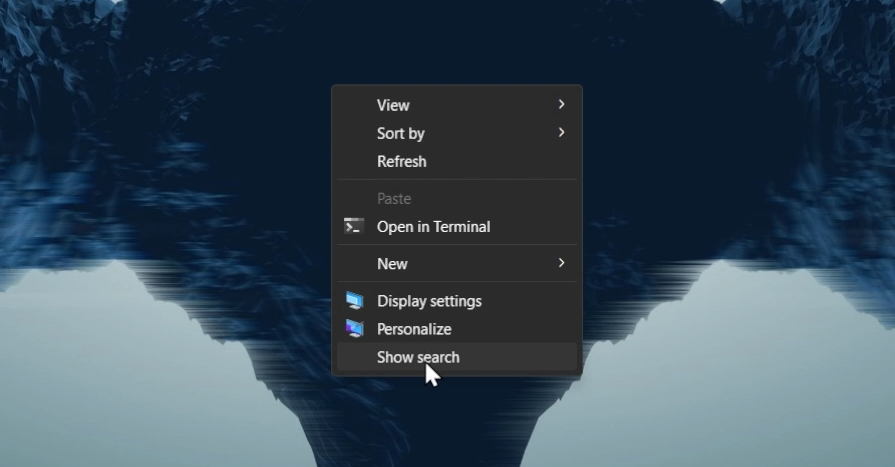
How to Disable the New Search Box
All you need to do is to right-click on the Desktop, click on Show more options, and uncheck Show search.
For a more in-depth tutorial, you can watch the video below from the youtube channel.
this does not work
It didnt work the first time, but when I restarted my pc twice it worked