In this article I will show you the necessary settings that you need to do in order to be able to install Windows 11 on VMware Workstation/Player. Unfortunately for Virtual Box there is no option that we can enable for now.
Microsoft recently included some restrictions even for virtual machines, so if you don’t have TPM 2.0 and Secure Boot enabled on your main computer as well, you won’t be able to install Windows 11 on a virtual machine, even if it is VMware or Virtual Box.
In following lines I will show you the recommended settings for a Windows 11 machine created with VMware Workstation. Don’t worry, the process is the same for VMware Player.
We are going to jump over the process of creating the machine, assuming that you already know that. If you don’t it is a very simple process.
Now click on Edit virtual machine settings and we will start changing some settings and enabling TPM 2.0 and Secure Boot.
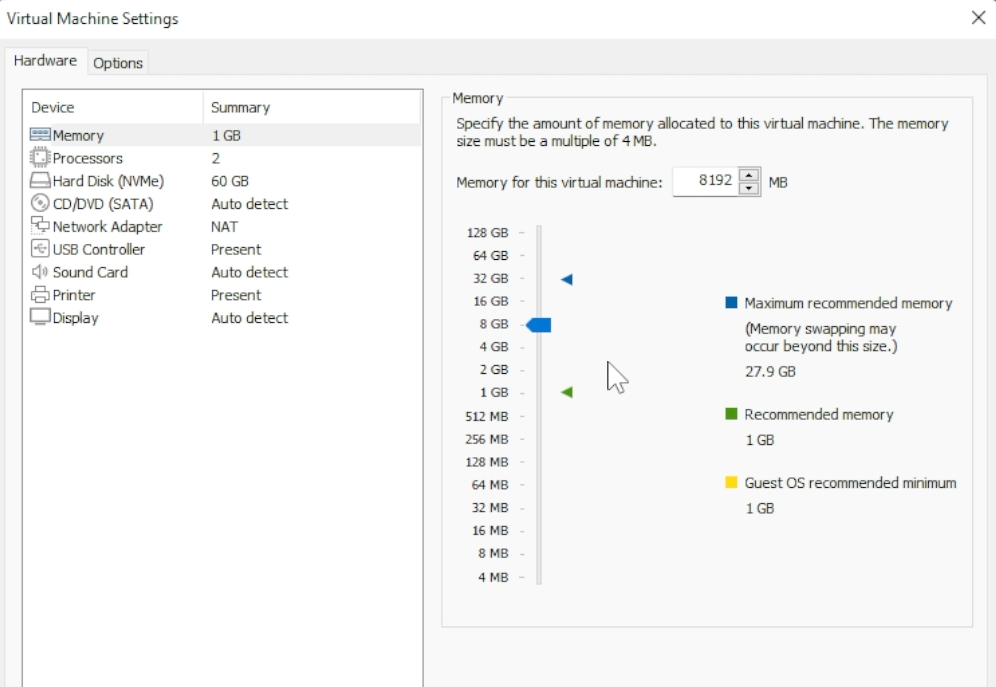
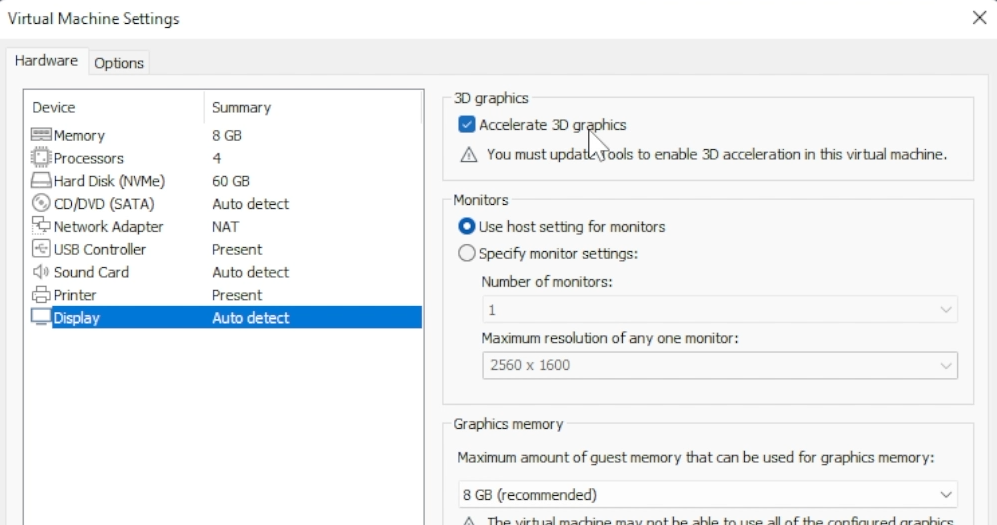
In the Memory section I recommend you use at least 8GB of RAM for Windows 11, to make sure you have a good experience.
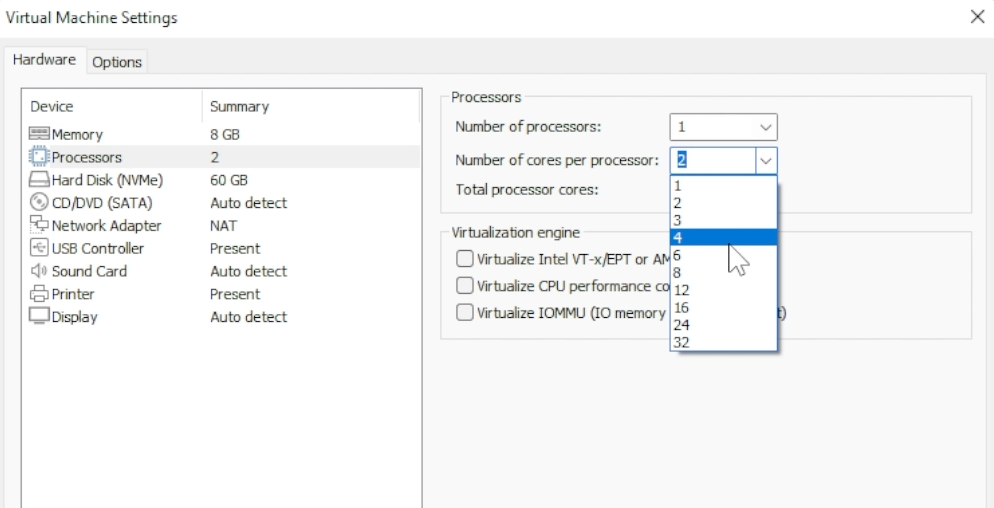
For the Processors you should use at least 4 Cores on your existing machine.
For the Display, make sure you have Accelerate 3D graphics enabled.
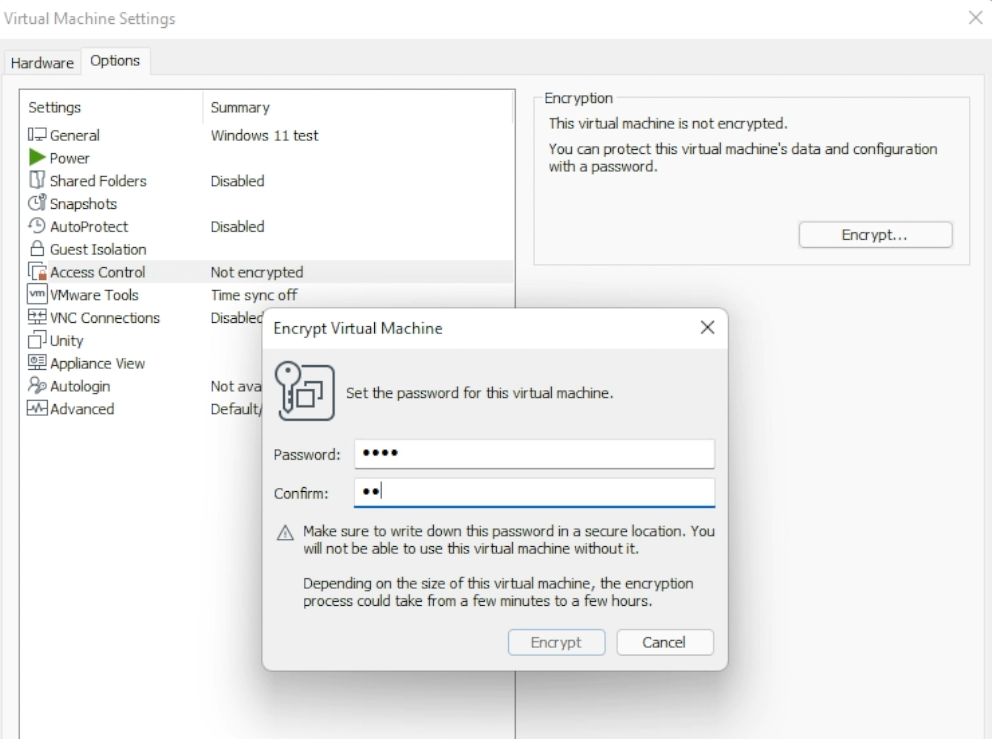
Now, to enable TPM 2.0 we are going to click on the Options tab and then on Access Control. Click on Encrypt and enter a simple password that you won’t forget. Finally click again on Encrypt.
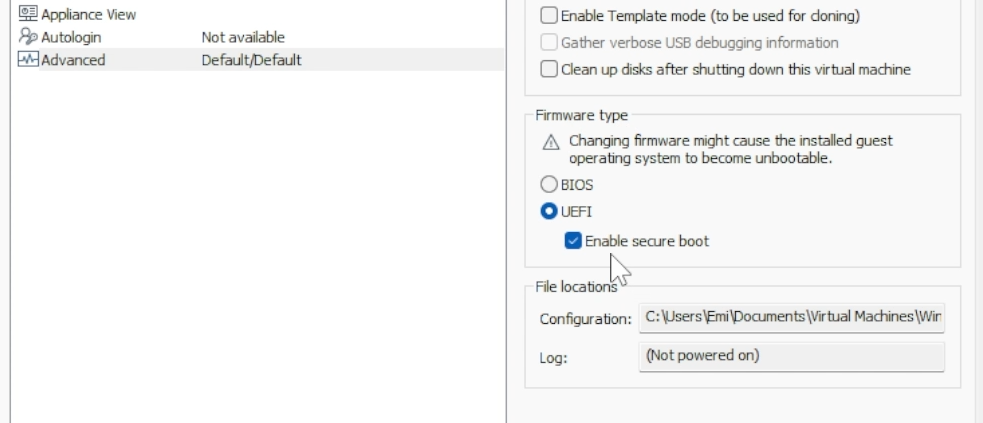
Next go and click on Advanced and on the Firmware type section click on UEFI and select Enable Secure Boot.
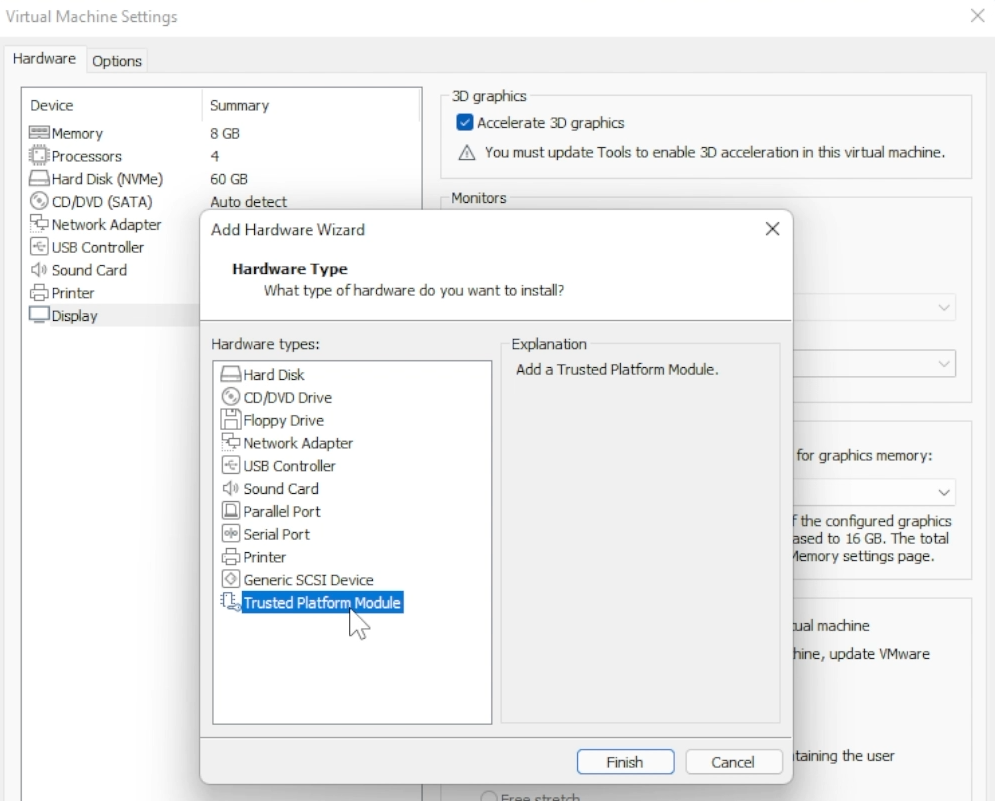
Go to Hardware again and click on the Add button. Select Trusted Platform Module from the list and click on Finish and OK.
This is how easily it is to enable TPM 2.0 and Secure Boot in VMware Player/Workstation.
For a more in depth explanation, you can watch the video below from the youtube channel.